If you want to learn how to setup 3CX on Windows, this guide explains the installation and configuration process step by step. You will learn how to install 3CX on Windows Server, configure firewall settings, connect SIP trunks, and provision the 3CX V20 Windows app for users. Most setups take less than one hour on a supported Windows environment.
This 3CX installation and support guide also helps businesses understand both deployment and ongoing maintenance requirements for stable system performance.
What Is 3CX and Why Use It on Windows?

3CX is a software-based PBX phone system that replaces traditional hardware telephone systems. Instead of maintaining expensive PBX hardware, businesses can run 3CX on Windows Server, cloud virtual machines, or hosted infrastructure.
3CX allows businesses to:
- Make and receive VoIP calls
- Use desktop and mobile softphone apps
- Host video meetings
- Support remote and hybrid teams
- Configure advanced call routing
- Integrate with CRM platforms
Since 3CX relies on VoIP technology for business communications, many organizations also evaluate the Best VoIP Provider for Small Business in UAE when planning their phone system deployment to ensure reliable call quality, scalability, and local support.
For UAE businesses, 3CX on Windows is popular because it integrates well with Microsoft infrastructure including Windows Server, Microsoft 365, Hyper-V, and Azure.
Benefits include:
- Support for Windows Server 2016, 2019, 2022 and 2025 (Standard and Datacenter), as listed in 3CX’s Windows installation guide
- Compatibility with Windows 10 and Windows 11 Pro — note that Windows 10 reached end of support on 14 October 2025, so a new PBX host should run Windows 11 or Windows Server even though 3CX still lists Windows 10 Pro/Enterprise as supported
- Remote work support through the 3CX Windows softphone app
- CRM integrations such as Salesforce, HubSpot, and Microsoft Dynamics, and you can explore more about 3CX Integration with CRM to understand how automation improves call workflows.
- Easy deployment on VPS hosting and cloud servers
- Free tier for small businesses: the former StartUP plan is now 3CX SMB, a free shared instance hosted by 3CX for companies with fewer than 10 users; a dedicated Windows installation like the one described here runs on its own licence (3CX’s 4SC Free Basic for micro setups, or a paid Basic, PRO or AI Edition)
To get the most out of this guide, it helps to first understand how 3CX works at a system level.
Many businesses today prefer hosted communication environments instead of traditional PBX hardware. Understanding What Is Cloud PBX System can help companies choose the right deployment model for scalability, remote work, and lower infrastructure costs.
Before starting the installation, it is important to review the 3CX system requirements and ensure your server meets the minimum hardware requirements for stable performance.

3CX Windows System Requirements (2026)
3CX hardware requirements define the minimum CPU, RAM, storage, and network resources required to run 3CX efficiently on Windows Server environments.
These requirements are essential for ensuring stable VoIP performance, avoiding call drops, and maintaining system reliability in business environments.
Before beginning your 3CX installation and configuration, verify that your server environment meets the supported requirements.
3CX Minimum Requirements for Windows Server
Understanding the 3CX minimum requirements helps ensure smooth deployment and avoids installation issues during setup.
Supported Platforms for 3CX Windows Server
| Platform | Supported |
| Windows 10 Pro | ✅ |
| Windows 11 Pro | ✅ |
| Windows Server 2016 | ✅ |
| Windows Server 2019 | ✅ |
| Windows Server 2022 | ✅ |
| Windows Server 2025 | ✅ |
| Windows Home Editions | ❌ |
Windows Home editions are not supported for 3CX PBX server deployment.
Minimum Hardware Requirements
| Resource | Minimum | Recommended |
| CPU | 2 Cores | 4+ Cores |
| RAM | 4 GB | 8 GB+ |
| Storage | 40 GB SSD | 100 GB SSD |
| Internet | Stable Broadband | Business Fiber |
Network Checklist Before Installation
Before you install 3CX on Windows:
- Assign a static internal IP address
- Install all Windows updates
- Disable unused network adapters
- Ensure only one default gateway exists
- Avoid VPN interfaces on the host machine — 3CX’s Windows requirements also rule out virtual networks and the TeamViewer VPN adapter, require a dedicated public IP and split DNS for the FQDN, and say the host must not double as a DNS, DHCP, Exchange, SQL or SharePoint server
- Use updated versions of Chrome, Edge, or Firefox
3CX also supports:
- VMware ESXi
- Microsoft Hyper-V
- AWS
- Google Cloud
- Microsoft Azure
Organizations often evaluate 3CX vs Teams to decide whether they need a full PBX system or a collaboration-focused platform before choosing a deployment model for business communication systems.
A stable network connectivity setup and a 1Gb LAN connection are recommended for optimal VoIP performance; 3CX’s own hardware guide calls 1Gb LAN the minimum, asks for at least 40 GB for the base system plus separate space for recordings (about 1 MB per recorded minute), and sizes a small Windows PBX of up to 10 extensions at 2 vCPUs, 4 GB RAM and 80 GB SSD.
Understanding 3CX hardware requirements helps businesses choose the right server configuration before installation.
Choose Your 3CX Deployment Method
Before starting the installation, choose your preferred deployment option.
| Deployment Type | Best For |
| Hosted | Small businesses |
| Azure | Microsoft environments |
| On-premise | Full control |
Option 1 — Hosted by 3CX
3CX manages the infrastructure and updates for you: in the Hosted by 3CX model the operating system, upgrades and 24/7 system and security monitoring are handled by 3CX, although technical support is not included in that service.
Best for:
- Small businesses
- Teams without dedicated IT staff
Option 2 — Private Cloud Deployment
You host 3CX on a cloud VPS or virtual machine.
Best for:
- UAE businesses requiring more control
- Companies needing scalable cloud infrastructure
This is also a popular choice for businesses searching for how to install 3CX on Azure.
Option 3 — 3CX On Premise Installation
3CX on premise installation means deploying the PBX server directly on your office Windows Server or virtual machine.
Best for:
- Full infrastructure control
- Existing Windows Server environments
- Businesses with internal IT teams
How to Install 3CX on Windows
If you are wondering how to setup 3CX on Windows for your business, the process includes downloading the installer, configuring your server environment, and completing the initial PBX setup wizard.
This section explains how to install 3CX on Windows Server and complete the initial deployment.
Step 1 — Create Your 3CX Account
Sign up through the 3CX portal and choose your deployment type.
During setup:
- Select On-Premise or Cloud deployment
- Choose your FQDN
- Configure extension length
- Set timezone and country
Important:
- Your FQDN cannot easily be changed later, and 3CX states the extension length cannot be altered at all once set
- Choose extension length based on future growth
Step 2 — Download the 3CX V20 Windows Installer
After signup:
- Log in to your 3CX account
- Navigate to Downloads
- Select Windows platform
- Download the installer
This process is commonly searched as:
- 3CX download for Windows 11
- Download 3CX app for Windows 10
- 3CX V20 Windows download
The same installer supports:
- Windows 10
- Windows 11
- Windows Server 2016 and 2019
- Windows Server 2022 and 2025
Users often search for 3CX Windows download and the configuration file download, which is automatically generated after setup.
Step 3 — Run the Installer
To install 3CX on Windows:
- Right-click the installer
- Select Run as Administrator
- Accept the license agreement
- Choose installation path
- Click Install
The installation process usually takes several minutes; the installer asks for a minimum of 10 GB free disk space for the PBX itself, with extra room for voicemail, recordings and prompts.
Step 4 — Complete the Setup Wizard

After installation, the 3CX setup wizard opens automatically. In V20 this local step is mainly about uploading the configuration file that 3CX generated when you registered the on-premise PBX at 3cx.com/install; country, language, time zone, prompts and the FQDN were already chosen there, so once the file is uploaded you are prompted to set the admin password and log in with the e-mail you registered with.
- If it does not open automatically, open your browser and navigate to http://YOUR-SERVER-IP:5015 (3CX’s documented port for the post-install configuration upload; port 5001 is the HTTPS port of the finished Admin Console and Web Client). Replace YOUR-SERVER-IP with the internal IP address of your Windows Server. For example: http://192.168.1.50:5015
During setup:
- Upload the configuration file generated at 3cx.com/install, or paste its download link
- Set the admin password when prompted
- Log in with the e-mail address you registered with
- Configure split DNS so the FQDN resolves inside and outside your network
- Open the firewall ports listed in the next section
After setup is complete, you can access the 3CX Admin Console.
This 3CX installation guide for Windows explains how to install and configure 3CX step by step using the official Windows installer.
3CX system setup includes installing the server, configuring system settings, setting up users, and connecting SIP trunks to enable full business communication functionality.
How to Setup 3CX Server on Windows
Once installation is complete, you must configure the PBX environment.
A proper understanding of how to setup 3CX on Windows helps prevent common deployment problems involving:
- Firewall configuration
- SIP trunk integration
- User provisioning
- Voicemail setup
- Call routing rules
- Security configuration
Businesses using Microsoft infrastructure often deploy 3CX Windows Server environments on Hyper-V or Azure virtual machines for improved scalability.
The 3CX server configuration process is a key part of the overall setup guide and includes firewall, users, and call routing settings.
Configure Firewall Ports for 3CX

Firewall configuration is essential for successful VoIP communication. 3CX’s Firewall & Router Configuration guide lists 5060 UDP and 5060–5061 TCP for SIP, 9000–10999 UDP for RTP (two ports per simultaneous call), 5090 TCP/UDP for the 3CX tunnel and 443 or 5001 TCP for HTTPS presence and provisioning, and it asks you to disable SIP ALG on the router.
Required SIP and RTP Ports
| Port | Protocol | Purpose |
| 5060 | UDP | SIP |
| 5061 | TCP | Secure SIP |
| 9000–10999 | UDP | RTP Audio |
One of the most important parts of learning how to setup 3CX on Windows is configuring firewall ports correctly for SIP and RTP communication.
Ports Required for the 3CX Windows App
After completing how to setup 3CX on Windows at the server level, the next step is deploying the 3CX V20 Windows app for employees and remote users.
| Port | Protocol | Purpose |
| 5090 | TCP/UDP | 3CX Tunnel |
| 443 | TCP | HTTPS & Provisioning |
| 5001 | TCP | Admin Console |
Run the 3CX Firewall Test
In Admin Console:
Help → Firewall Test
This verifies all required ports are properly forwarded.
One-way audio issues are usually caused by incorrect firewall or NAT configuration.
How to Install 3CX App on Windows

To install 3CX app on Windows, download it from the Microsoft Store or the 3CX Web Client, then open the provisioning file to configure your extension automatically.
This section explains how to install 3CX app on Windows for remote and office employees.
The 3CX V20 Windows app allows users to:
- Make and receive calls
- Access voicemail
- Join video meetings
- Manage presence status
- Control desk phones in CTI mode
After configuring the desktop client, businesses can also learn how to set up voicemail on 3CX app for mobile and remote employees.
The 3CX desktop client is easy to install: the install 3CX desktop app process works from the Microsoft Store or through web provisioning.
Method 1 — Install from Microsoft Store
- Open Microsoft Store
- Search for:
“3CX” - Click Install
- Launch the application
This is the recommended installation method for Windows 10 and Windows 11 users; 3CX deploys the Windows Softphone App through the Microsoft Store because every app there is security-checked by Microsoft before publishing, and after installation you enter your 3CX URL from the “Your 3CX Account Details” e-mail and sign in with e-mail or extension and password (or Google / Microsoft 365).
Method 2 — Install from the Web Client

- Open the 3CX Web Client
- Log in with extension credentials
- Click the Windows icon
- Download the provisioning file
- Open the .3cx file
This process automatically configures the application. In the current Windows Softphone App the Web Client’s Apps → Windows App tile shows a Provision button that opens the app with your extension already configured; the downloadable .3cx configuration file belongs to the older 3CX Client for Windows.
This process is also known as:
- 3CX configuration file download
- 3CX provisioning
- 3CX Windows client setup
How to Configure 3CX Windows Client
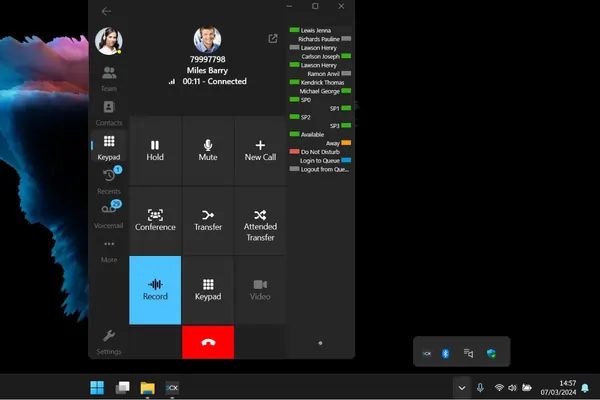
After installation, the next step is configuring the desktop application.
If you are searching for how to configure 3CX Windows client, follow the steps below.
Configure Softphone Mode
Softphone mode uses:
- Computer microphone
- USB headset
- Laptop speakers
Ideal for remote workers and hybrid teams.
Configure CTI Mode
CTI mode allows users to:
- Control desk phones from the desktop app
- Click-to-call from CRM systems
- Manage call transfers
Ideal for office environments.
Configure Presence Status
Users can manage statuses including:
- Available
- Away
- Lunch
- Do Not Disturb
- Business Trip
Each status can have separate forwarding rules.
How to Configure 3CX Softphone for Windows
If you are wondering how to configure 3CX softphone for Windows, the process is straightforward.
- Install the 3CX V20 Windows app
- Open the provisioning file from your welcome email
- Log in with extension credentials
- Choose Softphone or CTI mode
- Configure your headset and audio devices
After provisioning, users can immediately make and receive calls.
How to Install 3CX SBC on Windows
Businesses using remote IP phones can also install 3CX SBC on Windows.
The Session Border Controller (SBC) simplifies remote phone deployment by securely tunneling VoIP traffic between remote offices and the main PBX server.
This setup is commonly used for:
- Branch offices
- Remote IP phones
- Multi-location businesses
How to Install 3CX on Azure
To install 3CX on Azure, 3CX’s documented route is the Self Hosted (Private Cloud) option in the install wizard: you authenticate with your Azure subscription, pick a region, SSH key pair and machine type, and 3CX deploys its own pre-built PBX instance into your account (reached over SSH as user pbxexpress). Deploying your own Windows Server VM in Azure and running the Windows installer on it is treated like an on-premise install, so the firewall, split-DNS and static-IP requirements of this guide still apply.
Installing 3CX on Azure provides:
- Scalability
- High availability
- Flexible resource allocation
- Easier disaster recovery
Azure deployment is commonly used by enterprises and growing UAE businesses.
Essential 3CX Configuration Steps
After installation, complete these important configuration tasks. Before finalizing your setup, businesses often compare different deployment models and review 3CX Phone System Price to choose between hosted or on-premise solutions.
Add Extensions and Users
In Admin Console:
Users → Add User
Configure:
- Extension number
- Email address
- Voicemail PIN
- Forwarding rules
Configure Voicemail
Set voicemail greetings and call forwarding behavior for unavailable users.
Enable Call Recording
Admin Console → Call Reporting → Recording
Ensure your server has enough storage before enabling recording.
Configure CRM Integration
3CX integrates with:
- HubSpot
- Salesforce
- Microsoft Dynamics
- Google Contacts
- Microsoft 365
This section is important for businesses searching for how to configure 3CX with CRM systems and workflow automation.
Expert Tip:
Always run the 3CX Firewall Test immediately after installation to prevent one-way audio issues.
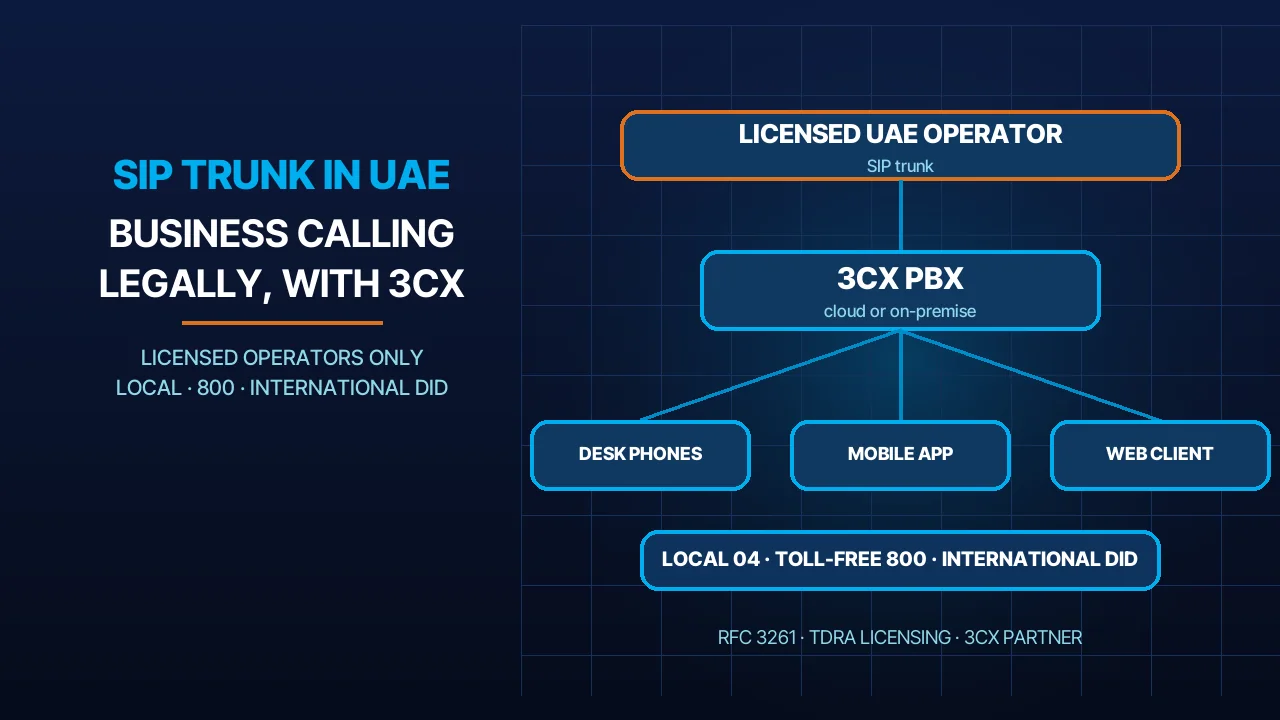
Connect a SIP Trunk to 3CX
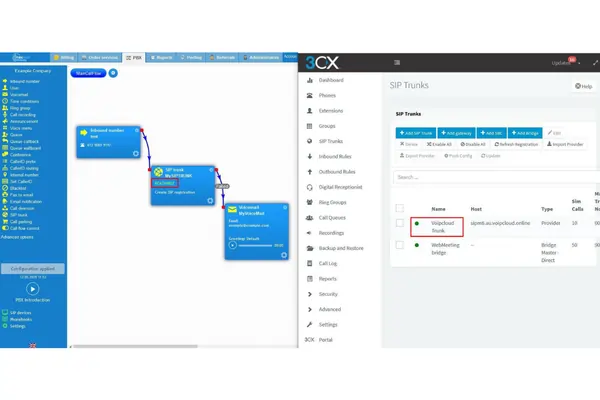
To make external calls, connect a SIP trunk provider. Understanding the VoIP and SIP Difference helps businesses configure SIP trunks correctly and choose the right communication infrastructure for their PBX environment.
In Admin Console: SIP Trunks → Add SIP Trunk
Configure:
- SIP server
- Username
- Password
- DID numbers
- Outbound call rules
For UAE businesses, always work with licensed SIP trunk providers to ensure regulatory compliance: the TDRA classes VoIP as a regulated telecommunications service that its licensees (e& and du) may provide, with third parties allowed only in collaboration with a licensee or with TDRA approval.
Companies looking to reduce operational costs often compare providers offering the cheapest SIP trunk for 3CX while maintaining call quality and regulatory compliance. Many businesses also evaluate a Best Internet Phone Service Provider to ensure reliable connectivity and voice performance for their 3CX deployment.
Proper 3CX configuration is required before activating SIP trunk services.
Need help configuring SIP trunks or firewall rules? BIGBANG ITS FZE provides complete 3CX deployment and support services across the UAE.
3CX Installation and Configuration Overview
Many users searching for 3CX installation and setup need a clear overview of both installation and configuration steps, including server setup, firewall rules, and client provisioning.
Common 3CX Windows Setup Problems and Solutions
Problem: No Audio During Calls
Usually caused by firewall or NAT configuration issues.
Solution:
- Open RTP ports
- Run Firewall Test
- Verify port forwarding
Problem: 3CX Windows App Not Provisioning
Solution:
- Re-send welcome email
- Allow the application through Windows Firewall
- Generate a new provisioning file
Problem: Admin Console Not Loading
Solution:
- Check 3CX services
- Verify port 5001 availability
- Restart the server
Problem: Wrong Time Zone
Solution:
- Set timezone to Gulf Standard Time (UTC+4)
- Sync Windows Server clock with an NTP server
How to Install 3CX on Android Phone
Besides Windows devices, businesses can also install 3CX on Android phones using the official mobile app and QR code provisioning.
This allows employees to:
- Make business calls remotely
- Access voicemail
- Join meetings
- Stay connected outside the office
Need Help with Your 3CX Setup in the UAE?
3CX installation and support involve not only deploying the system on Windows or cloud servers but also ensuring proper configuration, firewall setup, SIP trunk integration, and ongoing maintenance for stable performance.
BIGBANG ITS FZE provides professional 3CX deployment and support services across Dubai and the UAE.
Our services include:
- 3CX installation and configuration
- SIP trunk integration
- Firewall configuration
- Remote worker setup
- CRM integration
- Ongoing support and maintenance
Contact BIGBANG ITS today for a free consultation and professional 3CX deployment support.
Sources
- 3CX — Installing 3CX on Windows: supported Windows 10/11 Pro and Enterprise, Server 2016–2025; two cores and 4 GB RAM minimum; hypervisors; host preparation; 10 GB free disk; configuration-file upload on port 5015 (last updated 9 September 2026) (accessed 2026-10-12)
- 3CX — Installing 3CX: free 3CX SMB for fewer than 10 users; hosted by 3CX, private cloud or on-premise on Windows or Linux; FQDN and extension length cannot be changed (last updated 16 January 2026) (accessed 2026-10-12)
- 3CX — Firewall & Router Configuration: ports 5060/5061, 9000–10999, 5090, 443/5001; disable SIP ALG; Firewall Checker (last updated 25 September 2026) (accessed 2026-10-12)
- 3CX — Hardware Requirements: 1Gb LAN minimum, 40 GB base storage, ~1 MB per recorded minute, Small Windows PBX 2 vCPU / 4 GB / 80 GB SSD (last updated 23 April 2026) (accessed 2026-10-12)
- 3CX — 3CX Windows Softphone App: deployed via the Microsoft Store; sign-in with e-mail/extension, Google or Microsoft 365; Provision button in Web Client > Apps (last updated 27 July 2026) (accessed 2026-10-12)
- 3CX — Hosting 3CX PBX Phone System in Microsoft Azure: Self Hosted (Private Cloud) deployment through the 3CX install wizard, SSH user pbxexpress (last updated 17 July 2024) (accessed 2026-10-12)
- TDRA — Frequently Asked Questions: VoIP Regulatory Policy ver. 2.0; licensees (Etisalat/e& and du) provide VoIP services; third parties only in collaboration with a licensee or with TDRA approval (accessed 2026-10-12)
- Microsoft Learn — Windows 10 Home and Pro lifecycle: end of support 14 October 2025 (version 22H2 final) (accessed 2026-10-12)
FAQs
Is the 3CX app available for desktop computers?
Yes, the 3CX app is available for desktop computers. It can be installed on Windows and Mac devices, allowing users to make and receive business calls, access voicemail, and manage communications directly from their desktop.
What is a 3CX phone for Windows?
A 3CX phone for Windows is a desktop softphone application that allows users to handle VoIP calls from their Windows computer. It works as a virtual phone connected to the 3CX PBX system and supports features like call transfer, voicemail, and CRM integration.
How to setup 3CX app?
To set up the 3CX app, download it from the Microsoft Store or open it via the 3CX Web Client, then log in using your extension details or open the provisioning file sent by your administrator. The app will auto-configure your account.
How to set 3CX?
To set up 3CX, you need to install the 3CX server, complete the setup wizard, configure system settings such as FQDN and firewall ports, add users and extensions, and connect a SIP trunk for external calls.
Does 3CX have a desktop app?
Yes, 3CX offers a desktop application that works on Windows and Mac. The desktop app allows users to make and receive business calls, manage voicemail, join meetings, and control communications directly from their computer.
Is 3CX difficult to set up?
No, 3CX is not difficult to set up. The installation process is guided through a setup wizard that helps configure the server, firewall settings, users, and SIP trunk. Most basic setups can be completed within an hour on a properly configured Windows environment.
Talk to us directly — we usually reply within minutes during business hours.